Add CML History
Record a thickness measurement reading against a CML in SHIELD to build corrosion history and update remaining life calculations.
Overview
CML history records store individual thickness readings taken at a Corrosion Measurement Location over time. Each reading you add contributes to the CML's measurement history, which SHIELD uses to calculate corrosion rate and remaining life for the parent component. Accurate date, inspector, measurement method, and thickness data are all essential for reliable integrity analysis.
The inspector must already exist in SHIELD before they can be selected on a history record. If the inspector is not in the dropdown, add them first under Settings → Inspectors. See Add Inspectors for instructions.
Steps
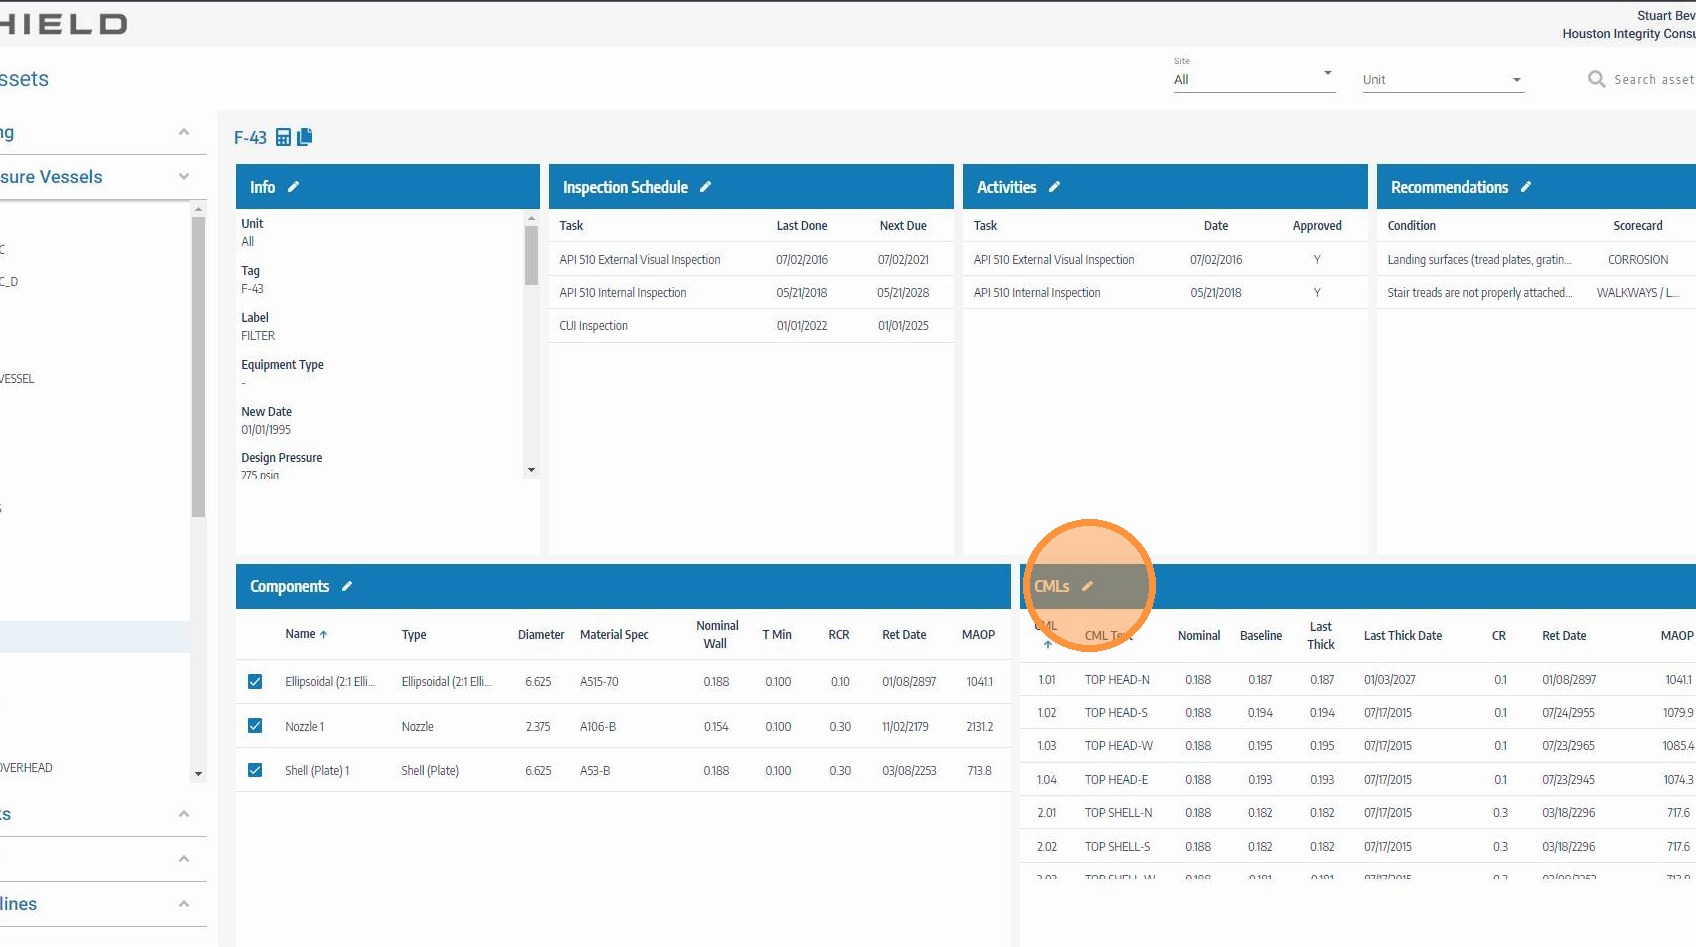
Navigate to the Asset and Open CML Editing Mode
Go to the Assets module and open the asset you want to add a thickness reading for. Click the edit icon on the CMLs header to enter CML editing mode.
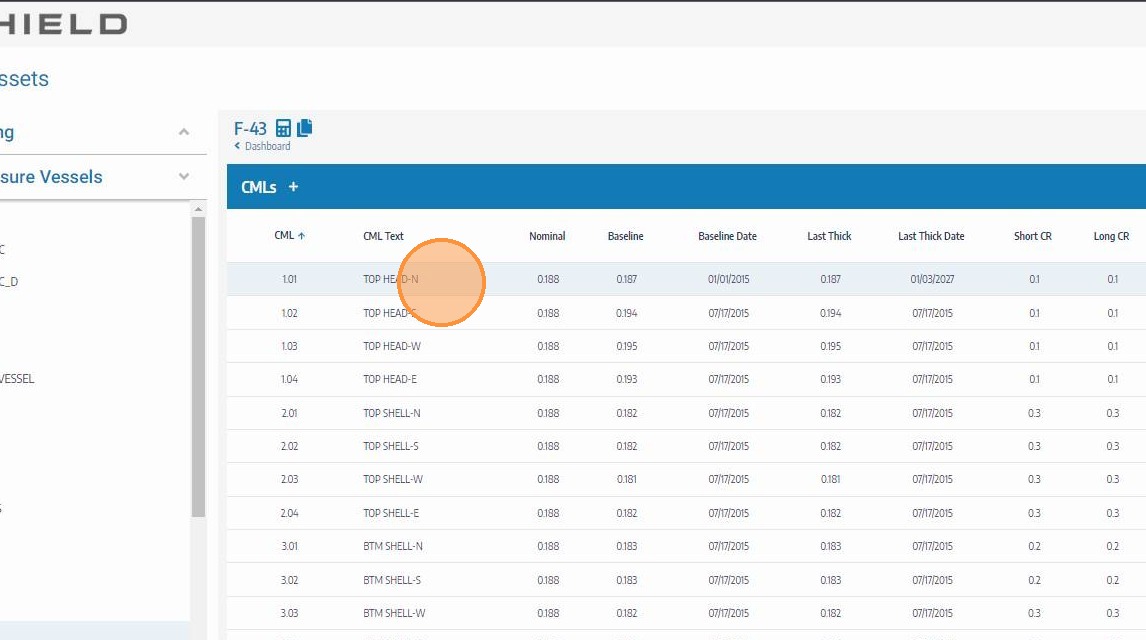
Click on the CML to Expand Its History
Locate and click the CML row you want to add a reading for. This expands the CML to reveal its measurement history list and the controls to add a new entry. Confirm the CML ID and description match the measurement location where the reading was taken.
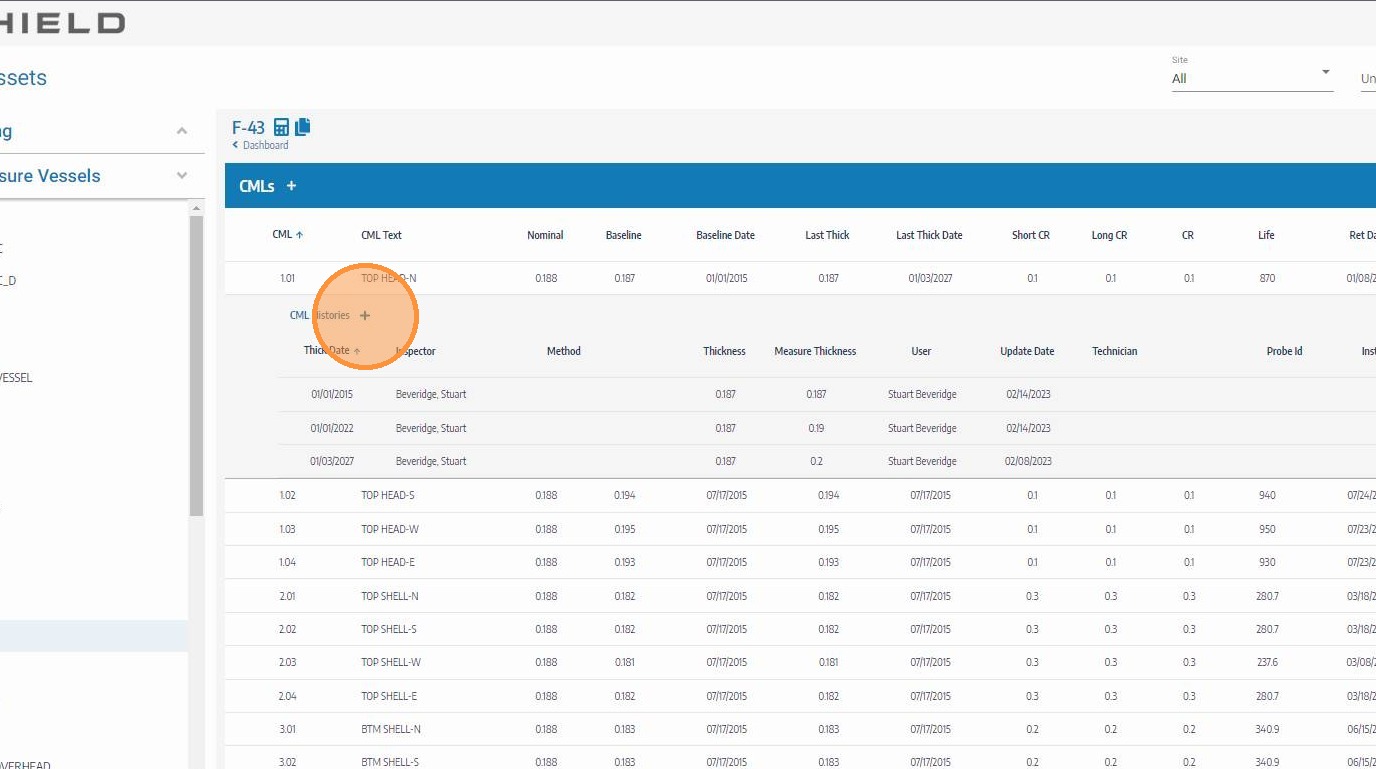
Click the Add Icon for a New History Reading
Click the Add icon in the CML history section to open a new measurement entry row. Each click adds one reading entry — use this for each individual thickness measurement taken at this CML.
Enter the Inspection Date
Enter the date the thickness measurement was taken in the field. Use the actual inspection date — not today's date — to ensure corrosion rate calculations and trending are accurate over time.
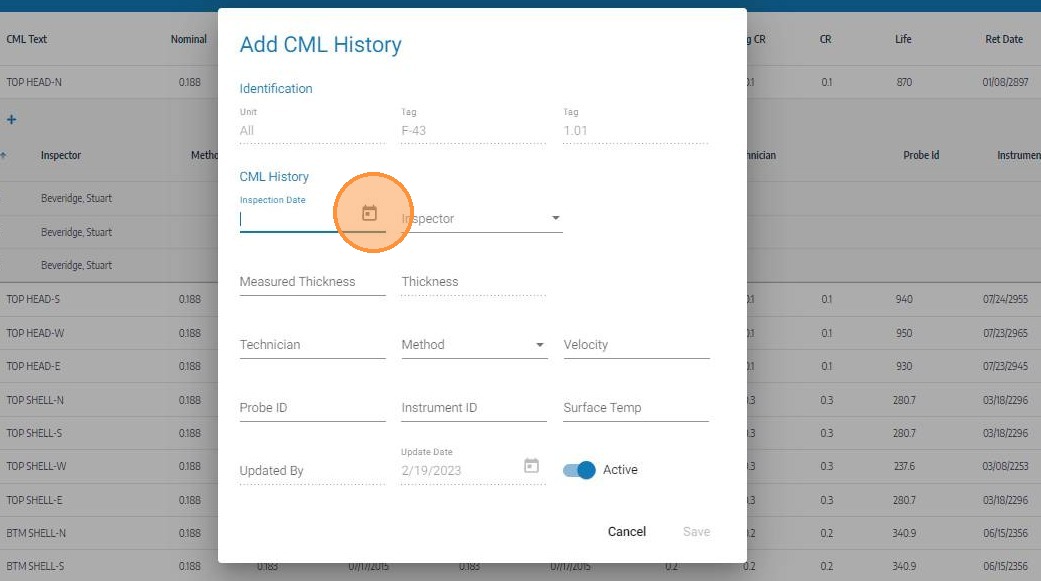
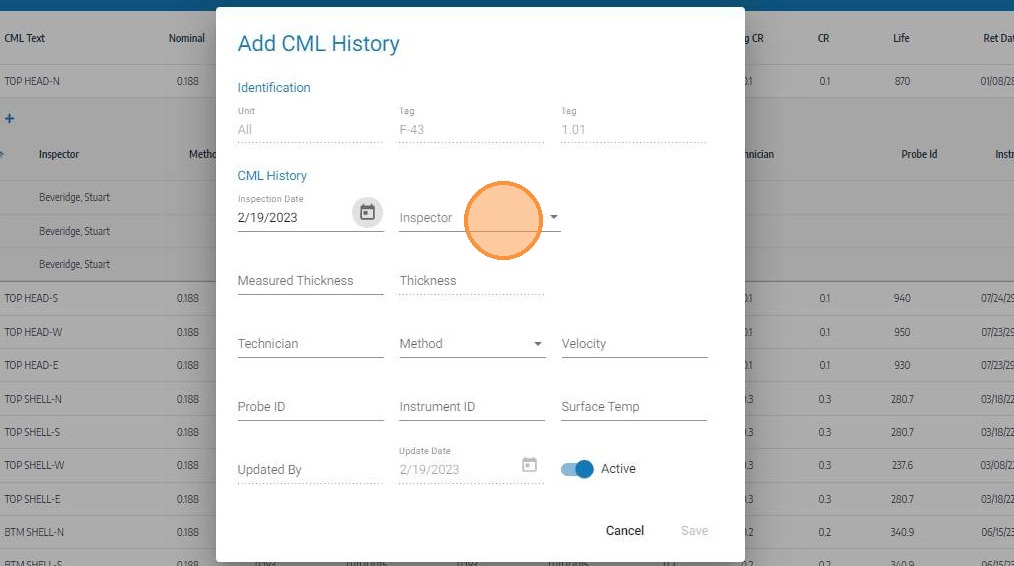
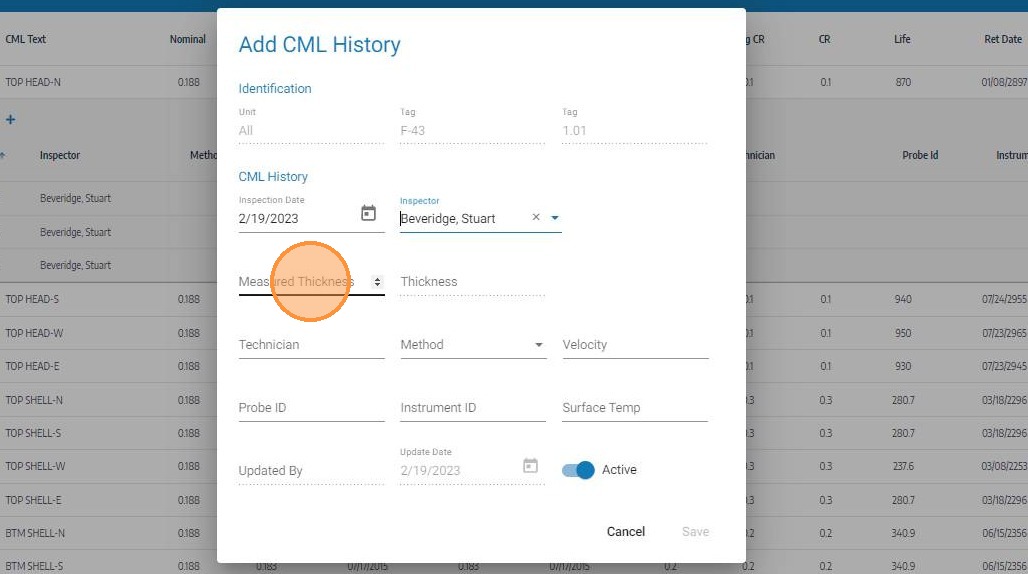
Select the Inspector
Use the inspector dropdown to select the person who performed the measurement. Only inspectors already configured in SHIELD will appear in the list. If the required inspector is not listed, add them under Settings → Inspectors before continuing.
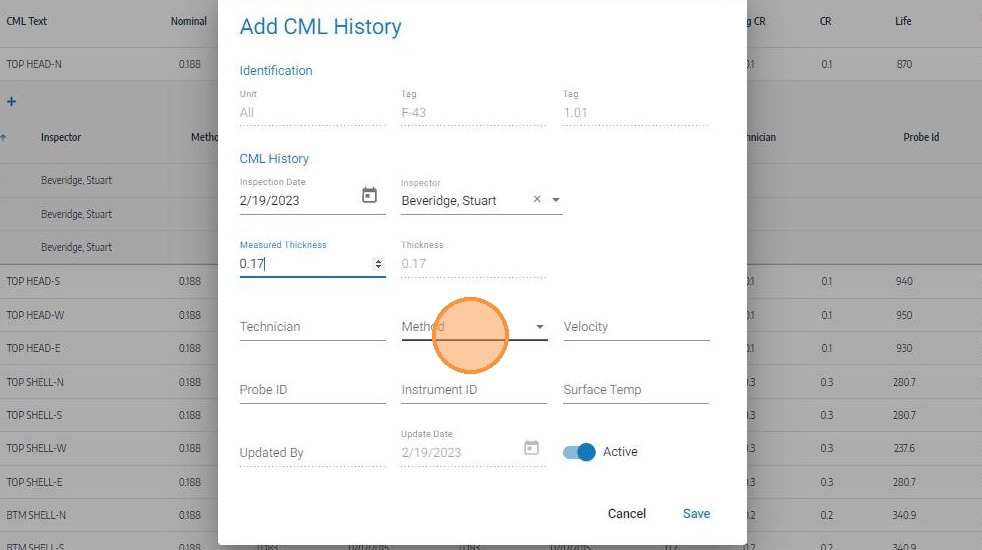
Enter the Measured Thickness
Enter the actual thickness reading obtained at the CML in the configured unit of measure (typically inches or mm). SHIELD will compare this value against previous readings for the same CML to calculate the corrosion rate and flag any significant wall loss or anomalous growth.
Complete Measurement Method and Device Information
Enter the remaining measurement details including method (e.g., UT straight beam, RT) and device information (e.g., instrument model or calibration reference). This data supports audit traceability and QA/QC verification of the reading.
Click Save
Click Save to record the thickness reading. SHIELD will update the CML's measurement history and recalculate the corrosion rate and remaining life for the parent component using the new data point.

Field Reference
| Field | Description | Required |
|---|---|---|
| Inspection Date | Date the measurement was physically taken | ✅ Yes |
| Inspector | Person who performed the measurement | ✅ Yes |
| Measured Thickness | Actual thickness reading in configured units | ✅ Yes |
| Method | Inspection technique (e.g., UT, RT) | ✅ Yes |
| Device / Instrument | Equipment used — model or calibration reference | ✅ Yes |
Troubleshooting
| Symptom | Cause | Fix |
|---|---|---|
| Inspector not in dropdown | Inspector not yet added to SHIELD | Add the inspector under Settings → Inspectors — see Add Inspectors |
| Corrosion rate not updating after save | Only one reading exists — rate requires two data points | Add at least one prior baseline reading so SHIELD has two points to calculate rate from |
| Thickness reading flagged as anomalous | Large variance from previous reading | Verify the reading is correct; if valid, add a note to the record explaining the deviation |
| CML history not visible after save | Page not refreshed | Refresh the asset record to confirm the reading has been added |