Create Components
Add components to an asset in SHIELD to define the physical elements used for corrosion rate analysis, remaining life calculations, and inspection planning.
Overview
Components represent the individual physical elements of an asset — such as pipe segments, shell courses, or nozzles — that are tracked for wall thickness, corrosion rate, and remaining life. Each component requires material and dimensional data so SHIELD can calculate the minimum required wall thickness automatically on save.
Component types available depend on the asset type selected. Ensure you are working on the correct asset before adding components — the available options will differ between piping, pressure vessels, storage tanks, and other equipment classes.
Steps
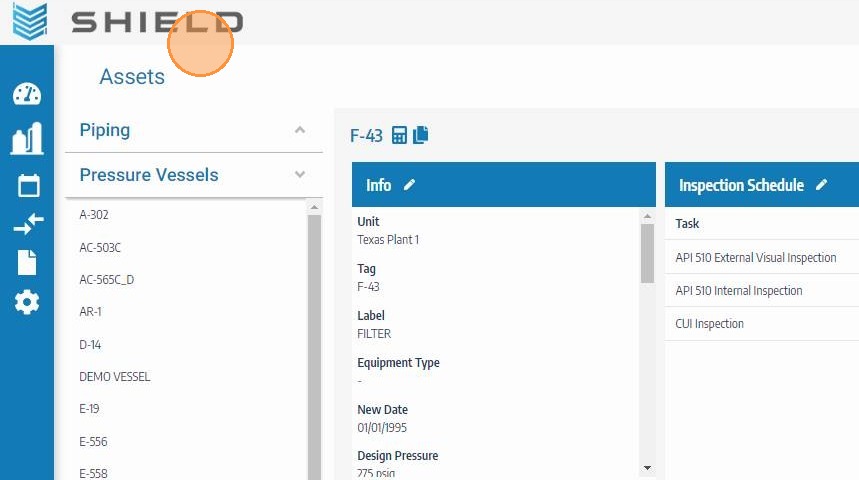
Navigate to the Asset
Go to the Assets module and open the asset you want to add components to. Confirm you are on the correct asset and that your site and scope filters are set appropriately.
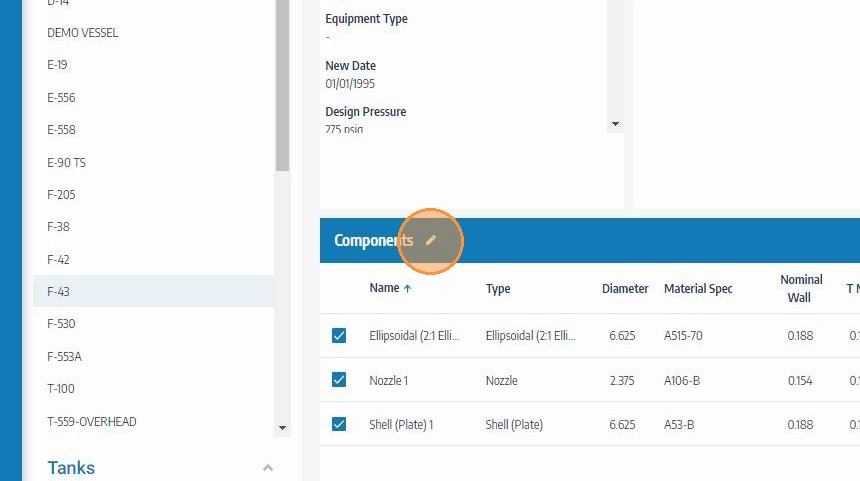
Click the Edit Button on the Components Header
Locate the Components section on the asset record and click its edit button to enter components editing mode. This unlocks the components table for new entries and modifications.
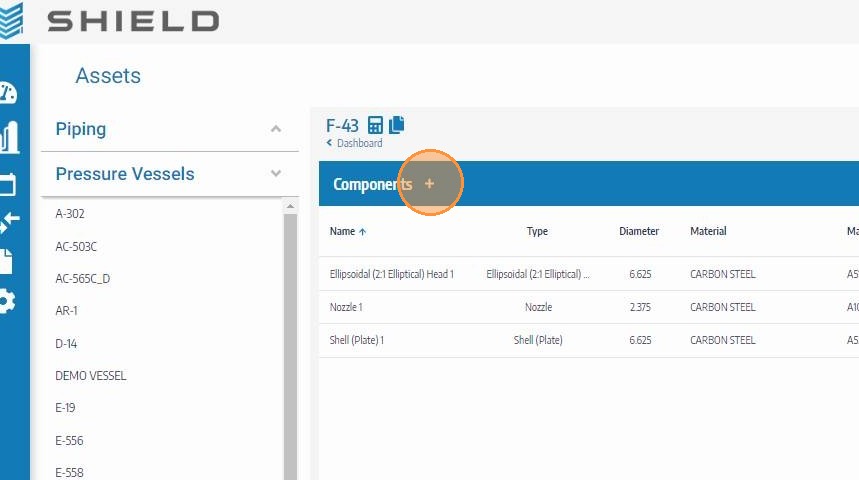
Click the Add Icon on the Components Table Header
Click the Add icon in the components table header to open a new component entry row. Each click adds one new component — repeat this step for each component you need to add to the asset.
Enter the Component Name and Select the Component Type
Type a descriptive component name (e.g., "Shell Course 1", "Inlet Nozzle N1") and select the appropriate component type from the dropdown. Component types are filtered based on the asset type — only valid types for the current asset class will be available.
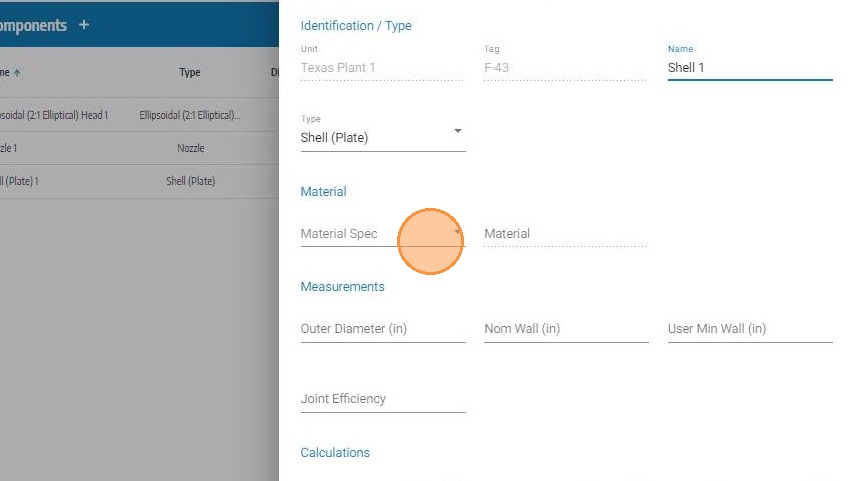
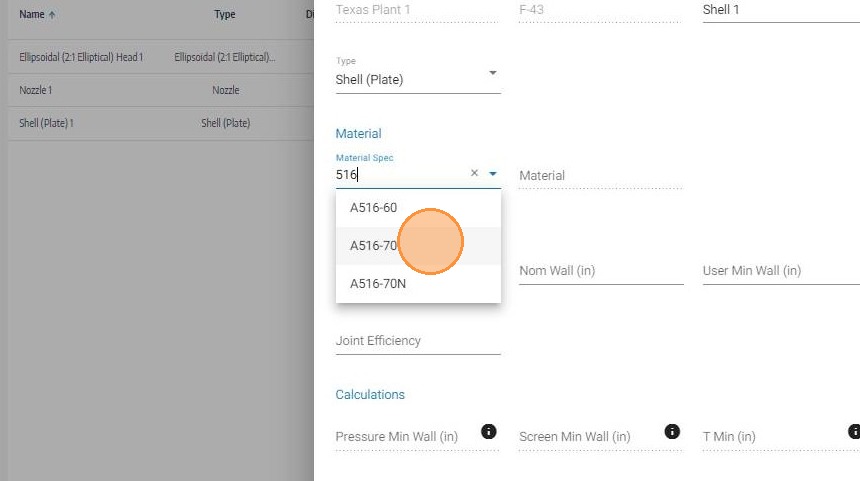
Select the Material Specification
Choose the material specification for the component from the dropdown list — for example, SA-106 Gr. B for carbon steel piping. The material spec is used in minimum wall thickness calculations, so accuracy here is essential.
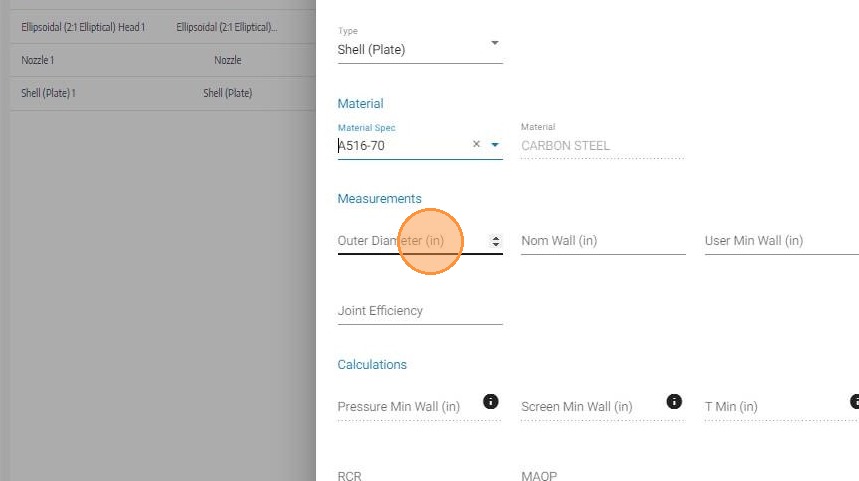
Enter the Diameter
Enter the outside or nominal diameter of the component in the appropriate unit of measure. This value is used alongside wall thickness and material data in corrosion rate and remaining life calculations.
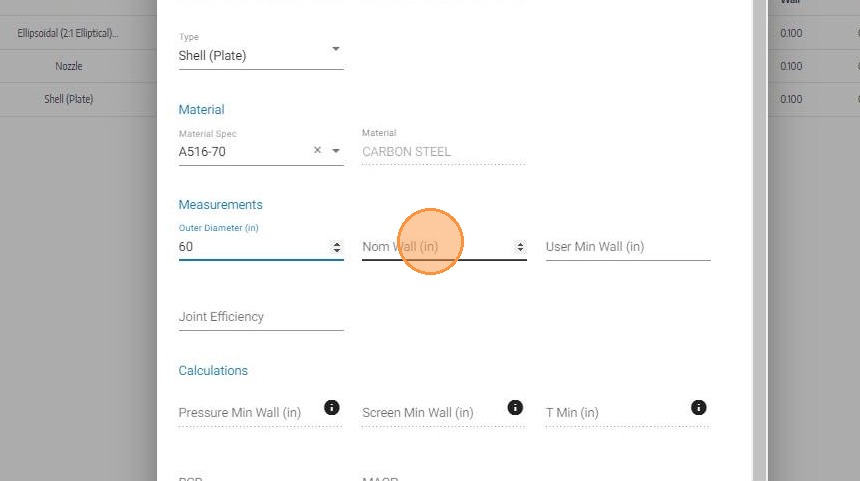
Enter the Nominal Thickness
Enter the nominal (original design) wall thickness of the component. This is the baseline thickness from which corrosion loss and remaining life are measured over time.
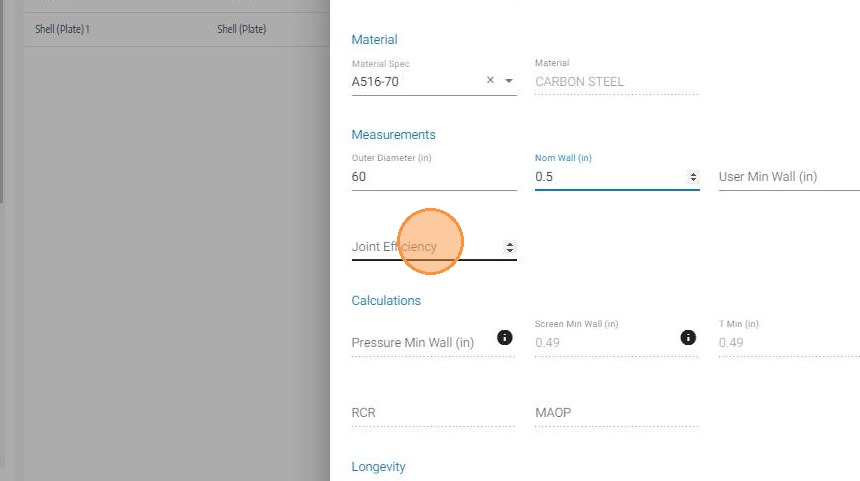
Enter the Joint or Weld Efficiency
Enter the joint or weld efficiency factor applicable to this component (e.g., 1.0 for seamless, 0.85 for ERW). This value is factored into the minimum required wall thickness calculation per applicable design code.
Save and Review the Calculated Minimum Thickness
Click Save. Once all required fields are complete, SHIELD will automatically calculate the minimum required wall thickness for the component and display it on the record.
If the calculated minimum does not reflect your engineering requirements — for example, if a higher corrosion allowance applies — enter an override value in the User Min Wall field before or after saving.

Field Reference
| Field | Description | Required |
|---|---|---|
| Component Name | Descriptive identifier for the component | ✅ Yes |
| Component Type | Physical classification — filtered by asset type | ✅ Yes |
| Material Spec | Design material specification (e.g., SA-106 Gr. B) | ✅ Yes |
| Diameter | Outside or nominal diameter in configured units | ✅ Yes |
| Nominal Thickness | Original design wall thickness | ✅ Yes |
| Joint / Weld Efficiency | Weld joint factor per design code (0.0–1.0) | ✅ Yes |
| User Min Wall | Engineering override for minimum wall thickness | ⬜ Optional |
Troubleshooting
| Symptom | Cause | Fix |
|---|---|---|
| Component type not available in dropdown | Asset type does not support that component class | Verify the correct asset type is assigned to the asset |
| Minimum thickness not calculating after save | One or more required fields are incomplete | Check all required fields are populated — all must be present for the calculation to run |
| Material spec not in the list | Spec not configured in your company's SHIELD database | Contact your administrator to add the material specification to the system lookup data |
| User Min Wall not accepting input | Field may be locked until initial save completes | Save the component first, then re-open to enter the override value |